Saturday, September 8, 2018

A Flop, Fixed!!


Many years ago Mr DV and I purchased a bread maker - it was during the time when they were very popular.  We could buy a bread mix for less than a loaf of bread and in 3.5 hours have great bread and a wonderfully bread-scented house.  The machine came with a little recipe book and we later bought another bread machine recipe book.  We trie many of the recipes in the books and if there was a bread machine recipe in the newspaper, we tried that too.  The problem with the bread maker was that the bread that it made was too good - it wan’t unusual for us to eat the whole loaf as it was cooling down, only to make a second loaf and eat that too.  After a while it seemed to make sense to just stick to store bought bread and have reasonable amounts of it in sandwiches.

We put the bread machine away in our basement and really never gave it another thought until recently when we were renovating our rec room and came across it in a storage cupboard.  We made a few loaves, ate them immediately and put the darn thing away again! But the taste of fresh home-made bread is hard to get out of one’s head.  Another teacher at my school told me about no-knead breads and i found some interesting and excellent recipes on the King Arthur Flour website.  Of course I substituted Earth Balance marg for the butter and soy milk for dairy milk if any was called for.

No knead breads are delightful for all that they are made using yeast and therefore defy all normal bread-making standards - usually bread must be kneaded twice - once before the first rise, and between the first and second rises.

Later one of my bridge partners sent me a recipe for no-knead focaccia.  I tried it, and it was great.

But here is how it flopped: for some unimaginable reason, I didn’t grease the pan in which i cooked the focaccia.  It tasted great, but around the edges it was adhered so firmly to the sides of my baking dish that I had to cut it out and leave one half an inch of focaccia stuck to the pan all the way around.  Then I had to soak the pan all day just to loosen the focaccia so I could scrape it off with a knife before I was able to wash the baking dish.  And the baking dish was a new favourite: a vintage square glass pan in the blue heaven pattern.  A mid-century classic.  I just love that pan and was worried that I had permanently destroyed it.

So here is the recipe.  I’ve changed it to make it my own.

3 cups of all-purpose flour
1 1/2 teaspoons kosher salt
3/4 teaspoons of yeast
1 1/2 cups of water - it does not need to be warm but shouldn’t be ice cold either.  Cool to room temperature is perfect.  


Add the flour, salt and yeast into a large mixing bowl and give it a stir to make sure everything is nicely blended.

Pour all the water in at once and stir until all the dry ingredients are incorporated.  It will look a bit shaggy but that’s ok.


Put a piece of plastic wrap over the bowl and set it aside for 12 to 18 hours.  I set mine on the stove because I knew I would not be using the stove until tomorrow so putting it there keeps it out of harm’s way while I am doing other things in the kitchen.  Don’t put it in the fridge and don’t put it somewhere warm.  Don’t open the oven door and put it on the door with the oven on warm.  Just set aside with the plastic wrap on it and leave it alone.


After 12 to 18 hours you will notice that the dough has risen substantially in the bowl all on its own.

Now preheat your oven to 450F

Prepare an 8 x 8 inch pan in your normal manner, with a cooking spray or shortening or vegan marg or whatever you like to use. If you love your baking dish, don’t skip this step!!!!!

Now pour 1/4 to 1/3 cup of olive oil in the pan.  It does seem like a lot but focaccia uses a lot of oil in the cooking.

Remove the dough from the mixing bowl and place it in the pan on top of the olive oil.  Stretch it out a bit so it is no longer in a ball but it isn’t necessary to work it into the corners of the pan.  

Use your fingers to poke indents all over the dough.  You will notice little bits of olive oil seeping up through these indents  but this is exactly what you want.


Sprinkle the top of the dough with sea salt.  Not too much but don’t be stingy either.  Then follow that with chopped fresh or dried herbs of your choosing.  Traditionally focaccia is made with chopped rosemary but I will be using chopped oregano tomorrow.  I have a rosemary bush but I’m afraid to use it because I’ve seen flies on it and i just don’t think I could get it clean enough to use.  It has become a purely decorative rosemary now.  I really should grown some indoors where I can protect it, germaphobe that I am.

Cover your pan with foil wrap and bake it in the preheated oven for 20 minutes, then remove the foil wrap and bake it for an additional 20 minutes or until it is golden brown.

You can see that this focaccia came out of the baking dish quite cleanly. A flop, fixed!


You can serve it with vegan cheese or on its own.  It is very nice cut in half horizontally and used to make a tomato, vegan mayo and basil sandwich.  


It’s an easy bread to make, and your house will smell amazing.  The only thing you have to remember if you want to make this bread for a function or for lunch, is that it has a long rising time and you need to account for that and plan your rise accordingly.

Friday, September 7, 2018

Blackened Tofu


Today’s theme was pick a colour.  I’ve chosen Black, for blackened tofu.  


There is a Cajun restaurant no far from me here in Scarborough and while it is not a vegan restaurant, it does have a few really good vegan mains, one of them being blackened tofu.

This is a dish so good that I thought I would try to make it myself.  The first step was to go in search of blackening spice which I am absolutely positive I have seen in stores and it was labelled “Blackening Spice” but I was unsuccessful in my search.


On the net I learned that there is no one recipe for blackening spice, that chefs make up their own mixture and go from there, but that they all have a few things in common: paprika and smoked paprika, cayenne pepper and black pepper, onion powder and garlic powder, oregano and a few other things like chilis etc.  So I bought whichever of those spices I currently didn’t have in stock (and sadly it was a lot of them because I had recently done a purge of my spices) and I mixed everything on a one to one basis with a little extra smoked paprika because I like it so much, and a little less cayenne pepper because I figured it would be wiser to go easy on the cayenne and add more later.  I think I was a little too easy on the cayenne.  I will need to add more to the jar.   I put it all in a mason jar and put on the lid and gave it shake to blend it.

I had a block of tofu left over from the tofu scramble yesterday.  I sliced it into four slices, lightly coated it in canola oil and then dipped in my blackening spice which i had put in a shallow dish. 


I made certain to coat the sides of the tofu as well, and then i put it in a hot frying pan into which i had put a little veggie broth so that the pieces would not stick.

I fried them until they were as black as they were going to get and then served them on a bed of rice with steamed carrots and broccoli florets.   It tasted exactly like the blackened tofu at the restaurant and the only difference was that my tofu pieces were not entirely black like they are at the restaurant.  Nonetheless they were black enough, and it was a great meal - tasty, visually intriguing and well-balanced.  


Now that’s downright vegan!


Thursday, September 6, 2018

But Protein Tho


What is it about veganism that inspires people to be suddenly worried about my protein intake?  In my pre-vegan days, if I only felt like eating an apple for breakfast, no one ever said “Hey, what about protein at this meal.?”  And I can guarantee if I saw one of my non-vegan friends having an apple I never said, “Hey, what about some protein with that apple?”

This is a perpetual annoyance for all vegans - it’s right up there with people insisting that milk is not cruel or eggs from free-run hens are ok eggs.

It isn’t hard to get all the protein that one needs in a day.  

Here is a typical day

Tea - I have several cups of tea in a day, probably too many, if such a thing is possible.  I use at least a cup of soy milk during the day in tea, at 9 grams per cup.

Breakfast


This morning I had over-night oatmeal for breakfast.

1 cup of soy milk = 9 grams of protein
1/2 cup of oatmeal = 5 grams of protein
10 almonds.   = 3 grams of protein 
1 tablespoon of dried cranberries = negligible protein
Total protein for breakfast = 17 grams.
Lunch

For lunch I had a sandwich made with whole wheat bread and Yves vegan turkey slices (not made from a real turkey)


Two slices of whole wheat bread =.  7 grams of protein
Five slices of Yves vegan turkey = 10 grams of protein
Two slices of Chao cheese.     = 0 protein
1tablespoon of Just Mayo. = negligible protein
1 banana.    = 1.1 grams of protein
Total protein for lunch. 18 grams of protein


Dinner
I had a delightful tofu scramble for dinner.


One red pepper, chopped = 2 grams of protein
Half an onion, chopped.    = .5 grams of protein
Tofu 175 grams   = 30 grams of protein
Spices = 0 grams of protein.
Total protein for dinner 32.5 grams


So my total of protein for the day is 76.5 grams (when you include the soy milk for my tea)  which is above the daily recommended requirement for a woman my age.  

Wednesday, September 5, 2018

Inspiring Cookbooks


I’m an unabashed vegan cookbook collector: I have three full or partial shelves of vegan cookbooks chez moi, and I also have 34 vegan cookbooks that are e-books so they’re on my iPad and can travel with me. 


It would be hard for me to select a single book that is my favourite or that inspires my cookery because I’ve borrowed from all of them, but the only one I’ve purchased twice Is John Robbins May All Be Fed. I purchased it twice because I had mislaid it and was upset about it.  By the time that happened, the book was out of print and i had to purchase it from an old books reseller on-line, but it was totally worth it.  Now I have a copy for my house and my summer cottage.


One of the reasons why I absolutely needed to re-purchase the John Robbins book was for the Oatmeal Apple Ginger cookies.  They are absolutely superb in every way.  I just love them.  I believe they were an invention of John’s son.


Tuesday, September 4, 2018

Artist Inspired

Today’s theme is Artist Inspired food and I’ve just seen an Instagram post where someone has decorated a cake to look like Van Gogh’s Starry Night.  It’s fabulous and I am feeling a little inadequate as a result.


I chose to make a Jackson Pollack inspired project.  The canvas for my modern art was a pan of Rice Krispies squares made with vegan Dandies marshmallows.


I used the recipe that is on the Vegan Dandies Website. I pressed the squares into my vintage Blue Heaven glass pan.


Then I coloured some plain icing with food colouring and piped it randomly over the squares.


It looks a bit like mess but my taster-in-chief said they were just fine, and that the icing was a nice touch.

Monday, September 3, 2018

Earl of Sandwich, I am Forever In Your Debt!!


I think when all is said and done, my favourite food in the world is a sandwich.  From the most humble of all sandwiches - the peanut butter sandwich -  to much fancier types of sandwich, the sandwich is a food item that never fails to catch my interest.  I like cold sandwiches, warm sandwiches, sandwiches with gravy on them, and it goes without saying that I love vegan ice cream sandwiches.  I like sandwiches on plain bread and crusty bread. I love the little sandwiches that are served at baby showers. I consider wraps to be sandwiches and I also consider food served in pitas to be sandwiches. And while I have no intention of starting an argument with anyone, I will assert here that the hamburger is a form of sandwich and so is a hotdog.  Vegan of course.  

Legend has it that the Earl of Sandwich asked for meat between bread during a marathon card-playing session way back when, and from there this handy meal took his name.  Nonetheless there is evidence that people were eating sandwiches well before that fateful card game.  No matter who named the sandwich, I love them.

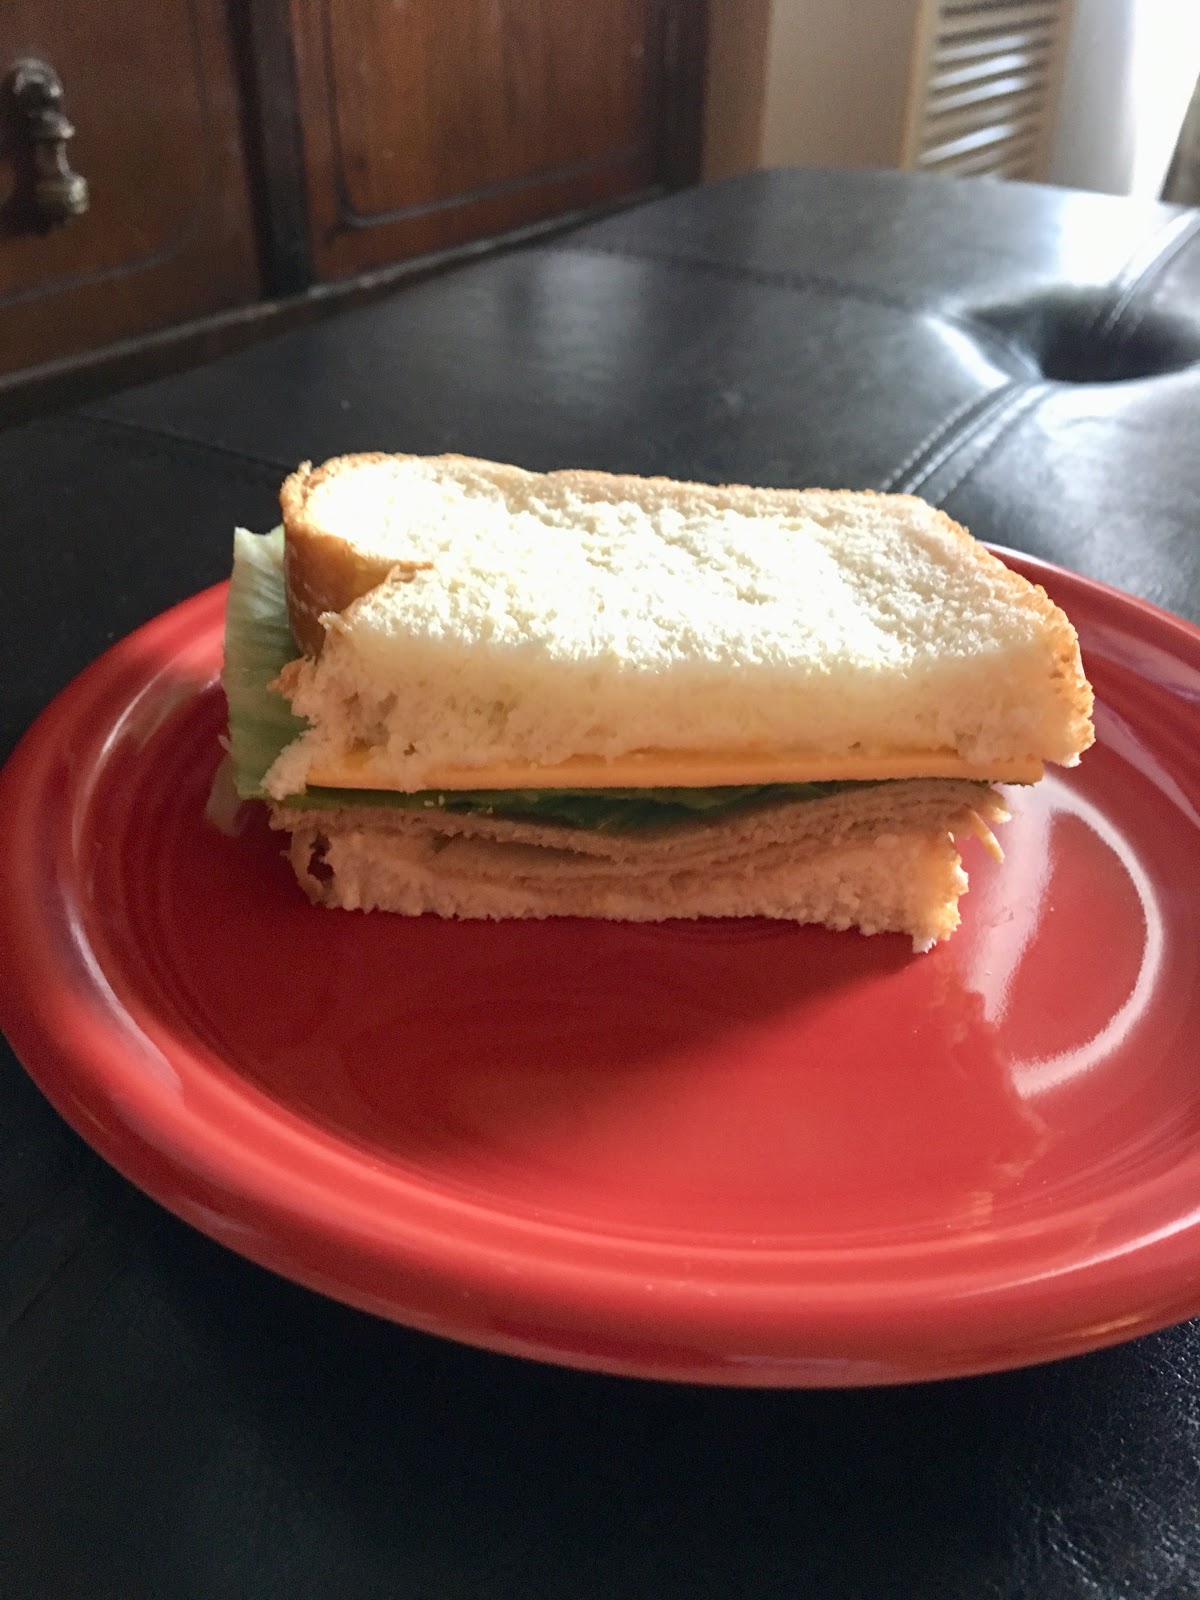
I will not be taking credit for the sandwich that I am presenting here today and on my instagram account - it was made by my sister Linda for a late lunch on a blistering hot Toronto day.  Who wants to turn on the oven under those circumstances?

This sandwich was simple but elegant and tasty and is the sort of sandwich that immediately makes me think, “Gee, I wish there was more!”

Vegan whole wheat bread
Vegan sliced cheese
Vegan chicken slices
Romaine lettuce with the hard centre stem removed
Vegan mayo
Dijon mustard - quick mustard fact: Canada is the world’s largest producer of mustard!

Put it all together and make a sandwich.


I am including a link to another of my sister’s amazing sandwiches: I hope you like it.

http://thesingularvegan.blogspot.com/2015/02/a-big-sandwich.html

Sunday, September 2, 2018

Croissants - Emoji Inspired!

Considering how unpleasantly hot and humid it is in Toronto today, I was sorely tempted to have an avocado-emoji-inspired post as was suggested in fun in the prompts, but a busy day left me no time to spare to dash to the store to pick one up, so I decided to make croissants, and I decided that I would bake them in my toaster oven so that I didn’t heat up the kitchen too much.

This croissant emoji may be copyrighted, according to Google images.  I make absolutely no claim on it as my own, and if I knew its origin, I would give it.


I know there is a traditional way to make croissants and puff pastry, and my hat goes off to bakers who make puff pastry.  I didn’t have enough time today to undertake such a task, but what I did have in my freezer was a package of vegan puff pastry which I used to make the croissants.

I made two types of croissants today, the traditional crescent-shaped croissant, and the pain au chocolat type which you might find in a fancy bakery.

I have used puff pastry to make many things, among them vegan sausage rolls, Eccles cakes, Cornish pasties, hand pies, pot pies, etc.  As long as you keep the pastry cool it isn’t hard to work with and gives good results.

First things first: Pre-heat your oven to 450 degrees Fahrenheit

I use a silicone rolling mat to cover my counter when I’m rolling out pastry, and an old wooden rolling pin that I’ve had for about 36 years.  I even put the rolling pin in the dishwasher when I’m finished with it.


It’s always a good idea to sprinkle a little all-purpose flour on the rolling surface and on the rolling pin so that the dough does not stick.  For good measure, I sprinkle a little flour on the puff pastry too.

The puff pastry that I purchased comes in two blocks in the package.  The instructions indicate that the pastry, which must be stored in the freezer, can be thawed overnight in the fridge or for two hours on the counter.  Once it is thawed it must be used and should not be put back in the freezer, for safety’s sake.  Sometimes it makes sense to separate the blocks before you thaw the pastry so that you can be sure to have one block that you can use later.

I used my bench knife to separate the two blocks of puff pastry, and put the second block into a zip-lock bag and put it in the fridge until I was ready to use it.


Working from the centre of the block of puff pastry, I rolled it out to roughly a 9 inch x 12 inch size.  It was not a perfect rectangle by any stretch of the imagination, but that’s ok, because the pastry needs to be trimmed and cut and shaped.
I have found that a really good tool for cutting puff pastry is a pizza cutter - because the blade rolls, it doesn’t drag or snag the pastry and makes for a good, clean cut.


I cut the pastry into rectangles the width of the rolled-out piece of dough and then cut across on the diagonal, length-wise, creating triangles of cut dough.


From there it is a simple matter to roll up the triangles, starting at the wide end, bending them into little crescents, brushing them with a bit of soy milk (or your favourite non-dairy milk) and putting them in the oven for twenty minutes.


They come out of the oven a beautiful golden brown and are delightful with vegan margarine or jam and are wonderful when accompanied by a cup of tea 


The second type of croissant I made today was a pain au chocolat.  I love them and it’s really hard to find vegan ones.  

I just left the oven on at 450

I rolled the pastry out as before, but instead of cutting it into triangles, I cut it into rectangles across the width of the pastry.


I rolled up pieces of semi-sweet chocolate in them, brushed the tops with milk and put them in the oven for 20 minutes.  I used fair trade chocolate. 


When they were cooked I sprinkled a bit of icing sugar on them and drizzled melted chocolate over them.


Saturday, September 1, 2018

Vegan MoFo 2018

Hi! My name is Lisa and this is my third Vegan MoFo, and the first one for which I will also be doing an instagram feed.  My Instagram account is @lisarturner.

I have been a vegan for about 10 years now and this is a lifestyle that I heartily encourage.   I will be posting some of my own recipes and will also perhaps offer  a guest post or two from friends.

My post tomorrow will be made fairly late in the day, like today unfortunately, but I hope to make the future posts in a more timely manner.

Thank you for looking at my blog.  I really appreciate it.

Friday, March 2, 2018

Blueberry-Lemon Muffins


I’m visiting my father for a few days. He loves blueberry muffins and likes to purchase gigantic ones from our local grocery store.  They are made with eggs and plenty of sugar and a lot of questionable oils, so they aren’t appropriate for me.  They aren’t appropriate for him or anyone else either, but that’s a subject for a whole other post!


I altered the recipe for my Cranberry-Orange Muffins to make these beauties — here’s the link should you wish to make them: https://downrightvegan.blogspot.ca/2018/02/cranberry-orange-muffins.html


These are not gigantic muffins.  The prep time is ten minutes and the cooking time is approximately twenty minutes so you could have a beautiful muffin in your hand a scant thirty minutes after deciding that you wanted to make them!!!


They are nice and light and are perfect with a cup of tea or coffee.


Ingredients
  • 2 Cups of All-purpose flour
  • 3/4 Cup of sugar - use fair trade!
  • 1.5 rounded teaspoons of baking powder
  • A pinch of salt
  • 1/4 cup of vegan margarine, well-chilled (I used Earth Balance)
  • Zest of one or two lemons, as you prefer - choose lemons with bright, tight peels - I find they grate better
  • Egg replacer to the equivalent of one egg - I used Ener-G Egg Replacer but feel free to use your favourite egg replacer
  • 3/4 cup of lemonade or soy milk or almond milk 
  • 1 cup of whole fresh blueberries, or frozen, or if using dried just use 1/2 cup
  • 1 cup of chopped walnuts - optional

Directions

First things first - for muffins, pre-heat the oven to 375 F.  If you are making a loaf, pre-heat to 350 F
  1. Add flour, sugar, salt, baking powder, and lemon zest to a large mixing bowl or to the bowl of a stand mixer, and whisk or stir until all of these ingredients are well-blended
  2. Using a pastry cutter or two knives, blend the vegan margarine into the flour until it is evenly distributed
  3. Add lemonade (or soy milk, etc)  and egg replacer and stir until all of the dry ingredients are incorporated into the wet ingredients.  Try to make sure there are no dry bits left at the bottom of the bowl. If necessary, you can add another tablespoon or two of lemonade (or soymilk, etc)  to help you incorporate all of the dry ingredients.
  4. Stir in the blueberries and the walnuts.
  5. Prepare a muffin pan in your preferred way - I use muffin papers.
  6. Divide the batter evenly between the twelve muffin cups in the pan.  I find that a large size cookie scoop is perfect for this purpose - it gives me uniformly-sized muffins and saves me from getting batter all over the pan.
  7. Put your muffins in the oven and set your timer for 17 - 22 minutes.  I find that if I am using fresh blueberries, the muffins take longer to cook.  I set the timer for 20 minutes and tested and I needed more time. I put them back for another three minutes and they tested as ready.  Of course ovens vary.  If you are making a loaf cook your loaf in a prepared pan for 60 to 75 minutes, but test first at 60 minute, and then every five minutes afterwards.


Saturday, February 24, 2018

Cranberry Orange Muffins

There is not a much better way to spend an afternoon than playing bridge with good friends, as I did this past Wednesday.  I made these beautiful Cranberry Orange Muffins to take along with me to share with my bridge ladies (and one man).


These are not gigantic muffins: on the contrary they are quite small, just the size of a muffin tin and not much larger, and that’s ok.


It’s ok because those huge commercial muffins are loaded with fat and sugar.  These muffins on the other hand have approximately a third of the sugar of a McDonald’s muffin and about one eighth of the fat.


I’m a fine one to talk - I love foods that are high in fat and sugar, but we pay the price for those foods in poor health, and if scientists are to be believed, diminished life expectancy.  So I will take a smaller muffin any day.


These little gems are easy and quick to bake - just 20 minutes in a 375 F oven.  If you prefer to have a Cranberry-Orange Loaf, you just turn down the oven to 350 F and cook them for 60 to 75 minutes.


Ingredients

  • 2 Cups of All-purpose flour
  • 3/4 Cup of sugar - use fair trade!
  • 1.5 rounded teaspoons of baking powder
  • A pinch of salt
  • 1/4 cup of vegan margarine, well-chilled (I used Earth Balance)
  • Zest of two oranges - choose oranges with bright, tight peels - I find they grate better

  • Egg replacer to the equivalent of one egg - I used Ener-G Egg Replacer but feel free to use your favourite egg replacer
  • 3/4 cup of orange juice
  • 1 cup of chopped dried cranberries, or chopped fresh cranberries
  • 1 cup of chopped walnuts
Directions

First things first - for muffins, pre-heat the oven to 375 F.  If you are making a loaf, pre-heat to 350 F

  1. Add flour, sugar, sal, baking powder, and orange zest to a large mixing bowl or to the bowl of a stand mixer, and whisk or stir until all of these ingredients are well-blended
  2. Using a pastry cutter or two knives, blend the vegan margarine into the flour until it is evenly distributed
  3. Add orange juice and egg replacer and stir until all of the dry ingredients are incorporated into the wet ingredients.  Try to make sure there are no dry bits left at the bottom of the bowl.
  4. Stir in the cranberries and the walnuts.
  5. Prepare a muffin pan in your preferred way - I use muffin papers.
  6. Divide the batter evenly between the twelve muffin cups in the pan.  I find that a large size cookie scoop is perfect for this purpose - it gives me uniformly-sized muffins and saves me from getting batter all over the pan.
  7. Put your muffins in the oven and set your timer for 17 - 22 minutes.  My muffins were perfect at 20 minutes.  I tested at 17 and they were not fully cooked.  Of course ovens vary.  If you are making a loaf cook your loaf in a prepared pan for 60 to 75 minutes, but test first at 60 minute, and then every five minutes afterwards.
  8. Variations on a theme: try blueberries in place of cranberries.


Winter Warmer-upper

This is an update of a post that was originally written in 2014. This is one of my go-to winter soups. I had some squash in my freezer lef...